Keycloak
Steps verified in the identity provider's admin console.
Recommended protocol: OpenID Connect.
SAML 2.0
Connect Keycloak with SAML 2.0
This guide is not available in your language yet; it is shown in en.
-
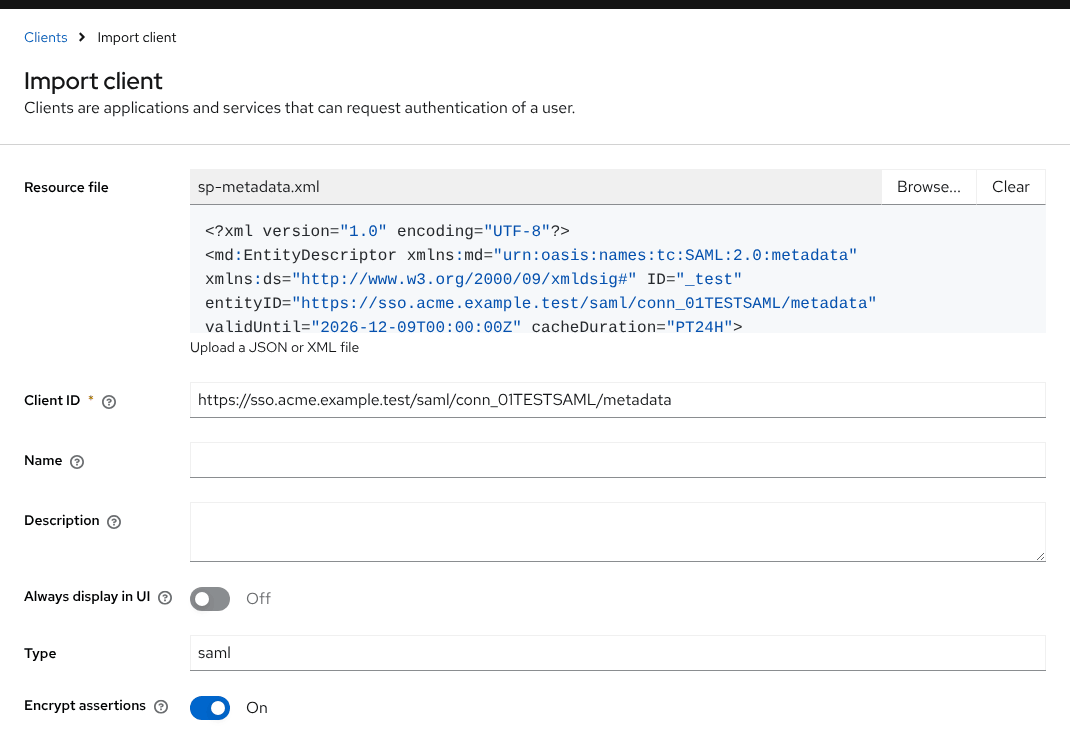
In the Keycloak Admin Console select the realm, open Clients and click Import client. Save the KeenAuth SP metadata from SP metadata URL to a file, load it as the Resource file and click Save; Client ID becomes SP entity ID and the ACS URL ACS URL. Without the file: click Create client, choose Client type SAML, enter Client ID SP entity ID, click Next and Save, then on the Advanced tab set Assertion Consumer Service POST Binding URL to ACS URL and click Save.
-
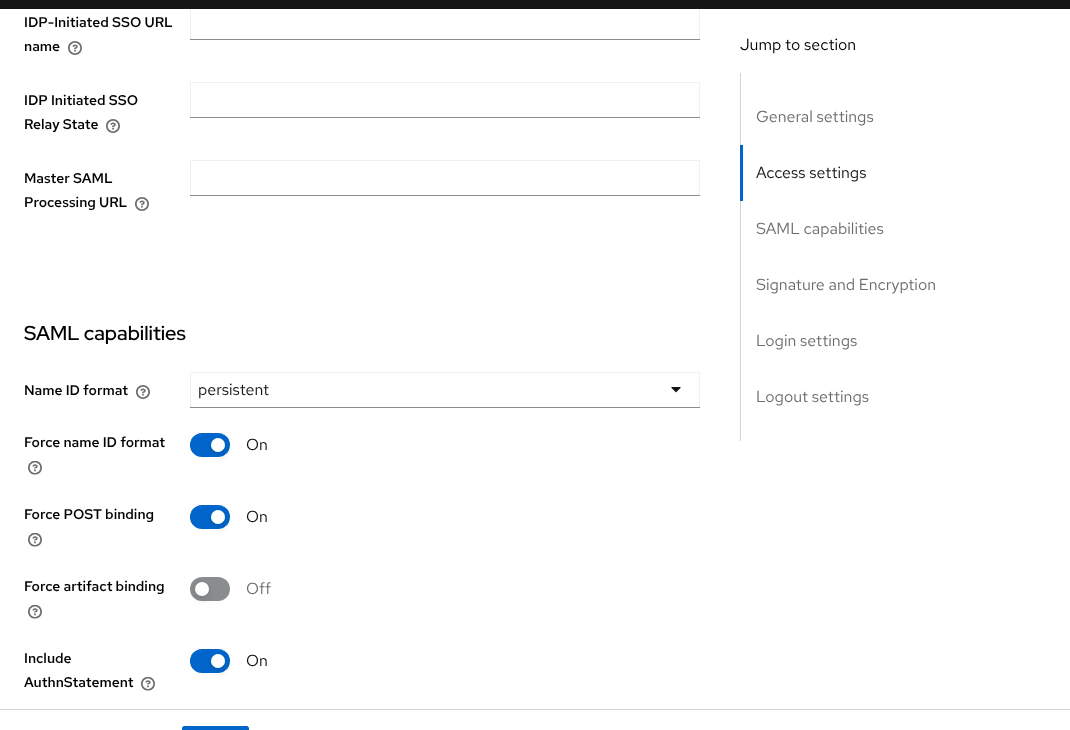
On the client's Settings tab, under SAML capabilities, set Name ID format to persistent, turn on Force name ID format and click Save. On the Client scopes tab open SP entity ID-dedicated, click Configure a new mapper (Add mapper > By configuration once a mapper exists), choose User Property and add three mappers with Name and Property email, firstName and lastName, the same SAML Attribute Name and SAML Attribute NameFormat Basic; these names match the KeenAuth Keycloak profile.
-
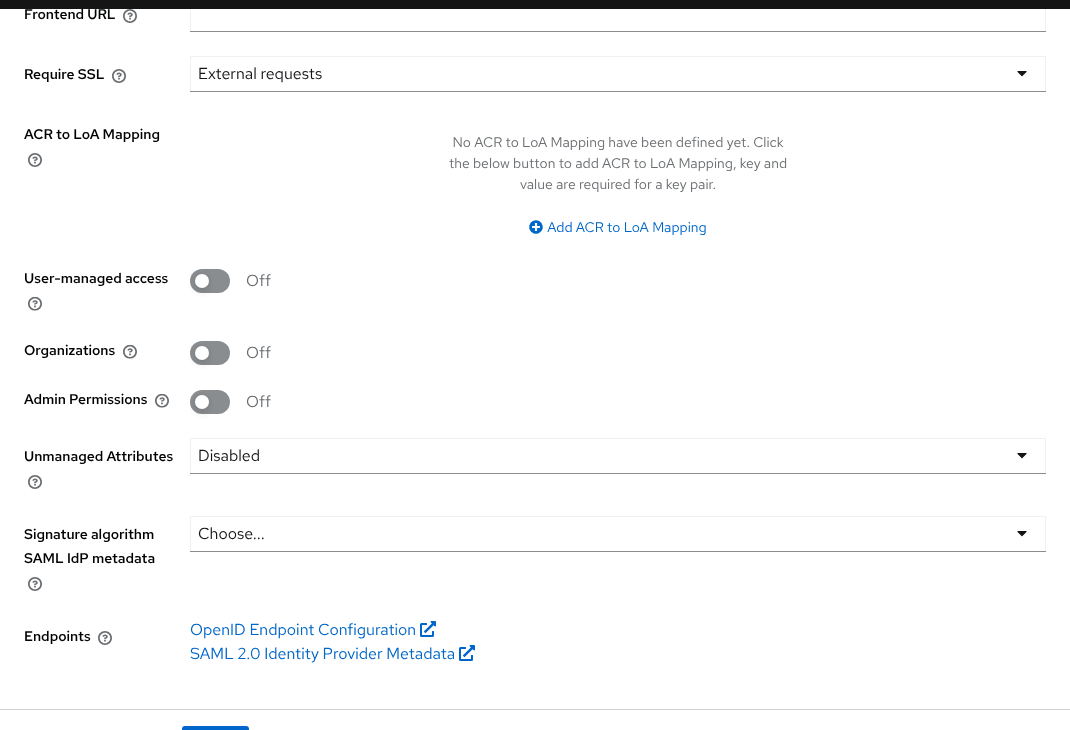
Give KeenAuth the realm's SAML descriptor: <root>/realms/{realm-name}/protocol/saml/descriptor (Realm settings > General > Endpoints > SAML 2.0 Identity Provider Metadata).
OpenID Connect
Connect Keycloak with OpenID Connect
This guide is not available in your language yet; it is shown in en.
-
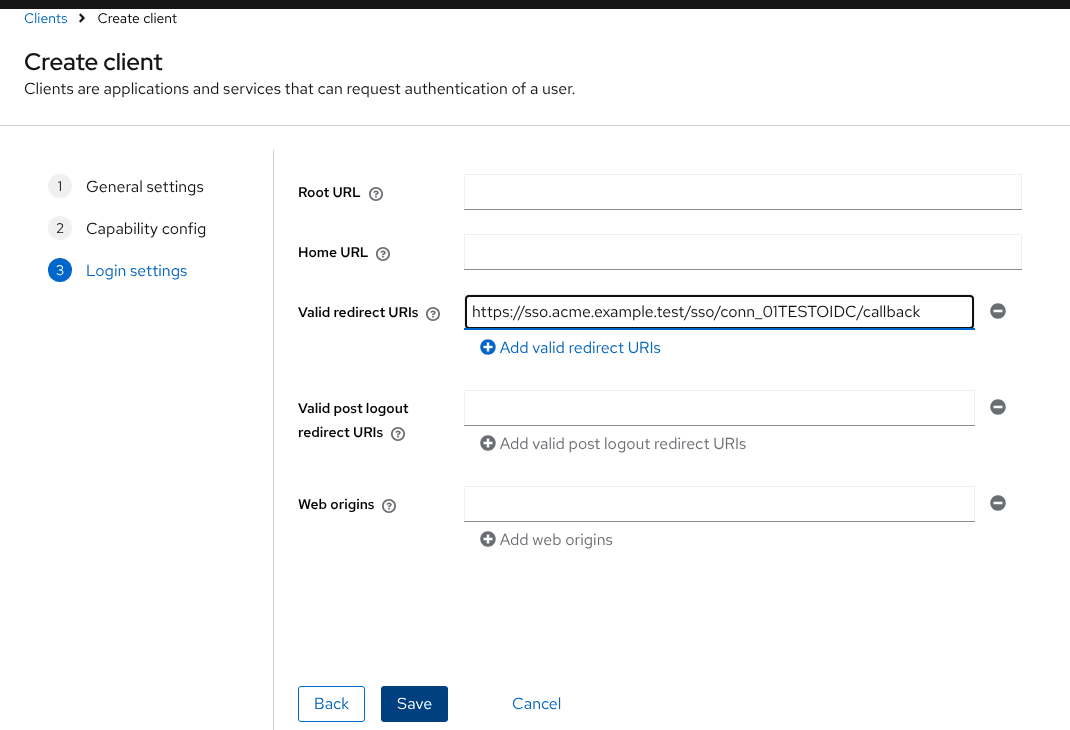
In the Keycloak Admin Console select the realm, open Clients and click Create client. Keep Client type OpenID Connect, enter a Client ID and click Next; turn on Client authentication, keep Standard flow selected and click Next; add redirect URI under Valid redirect URIs and click Save.
-
Use the realm issuer <root>/realms/{realm-name}; its discovery document is at /.well-known/openid-configuration under that path (Realm settings > General > Endpoints > OpenID Endpoint Configuration).
-
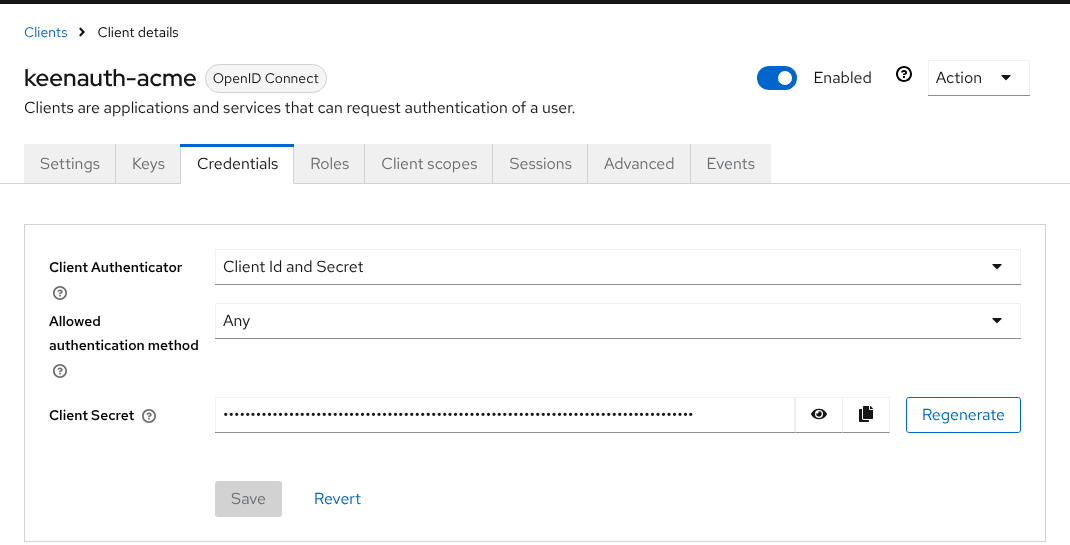
On the client's Credentials tab (Client Authenticator: Client Id and Secret) copy the Client Secret. Enter the issuer, client ID and client secret in KeenAuth and run the connection test.
Values in bold are shown on the connection's page in the Admin Portal, where this guide has them filled in.