Salesforce (kimlik sağlayıcı olarak)
Steps not yet verified in the identity provider's current admin console.
Recommended protocol: SAML 2.0.
SAML 2.0
Connect Salesforce (as identity provider) with SAML 2.0
This guide is not available in your language yet; it is shown in en.
-
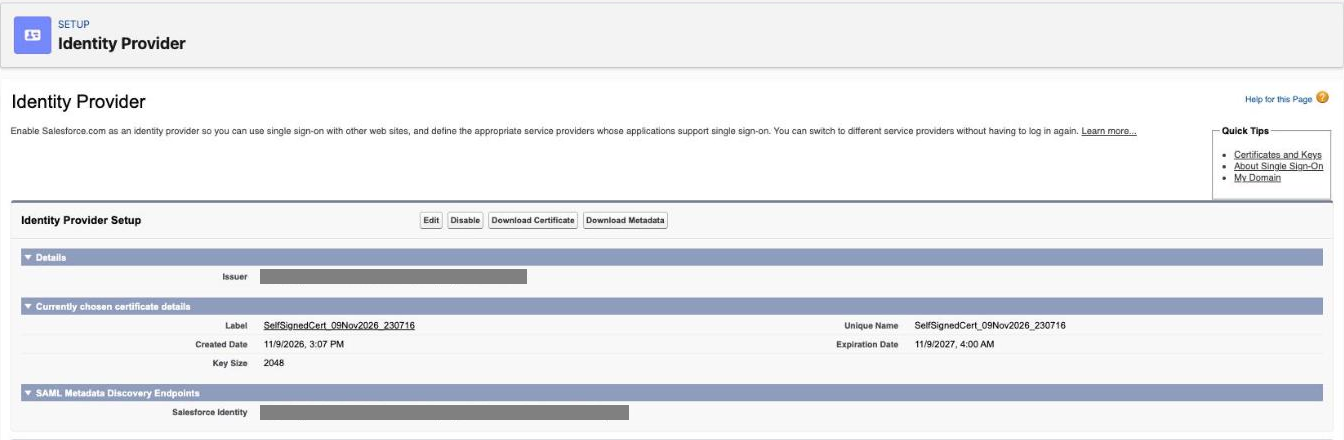
In Setup open Identity Provider, click Enable Identity Provider, choose the certificate Salesforce uses as identity provider (by default a self-signed certificate) and click Save. You need the Customize Application permission plus either Modify All Data or Manage Connected Apps.
-
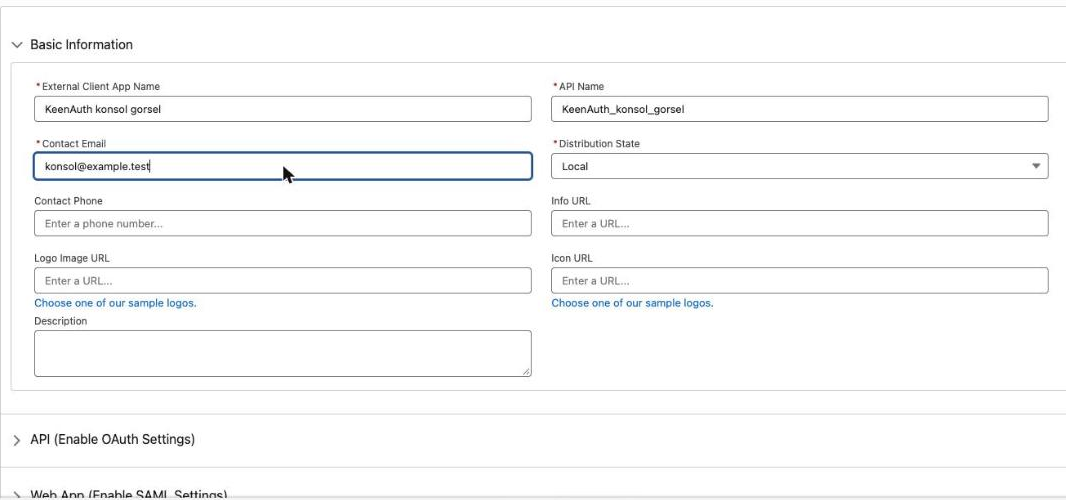
In Setup open App Manager and choose New App > New External Client App (new connected apps are no longer offered as of Spring '26). Under Basic Information enter External Client App Name, API Name and Contact Email and keep Distribution State Local.
-
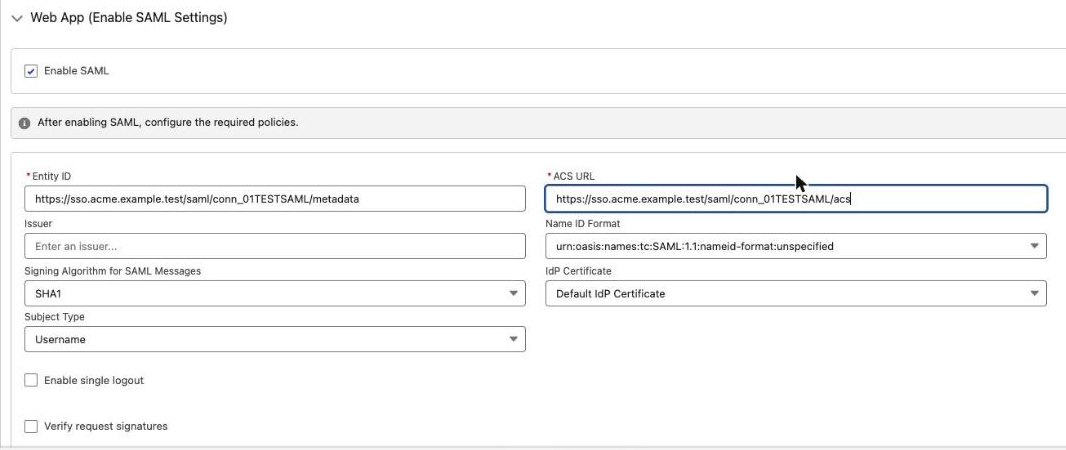
Expand Web App (Enable SAML Settings), select Enable SAML and enter the Entity ID SP entity ID and the ACS URL ACS URL from KeenAuth.
-
Choose Subject Type (username, federation ID, 15-character user ID, a custom attribute or a persistent ID) and Name ID Format (default Unspecified; email address, persistent or transient) so that the value matches the identifier KeenAuth should use for the user. With Name ID Format set to email address, Experience Cloud users get the org ID appended to the email address; if KeenAuth needs the plain email address, create a custom attribute for it.
-
Leave Issuer at your org's My Domain login URL unless you need another value. If you want users logged out of KeenAuth when they log out of Salesforce, select Enable Single Logout, enter the KeenAuth single logout URL single logout URL (absolute, starting with
https://) and select the HTTP binding. -
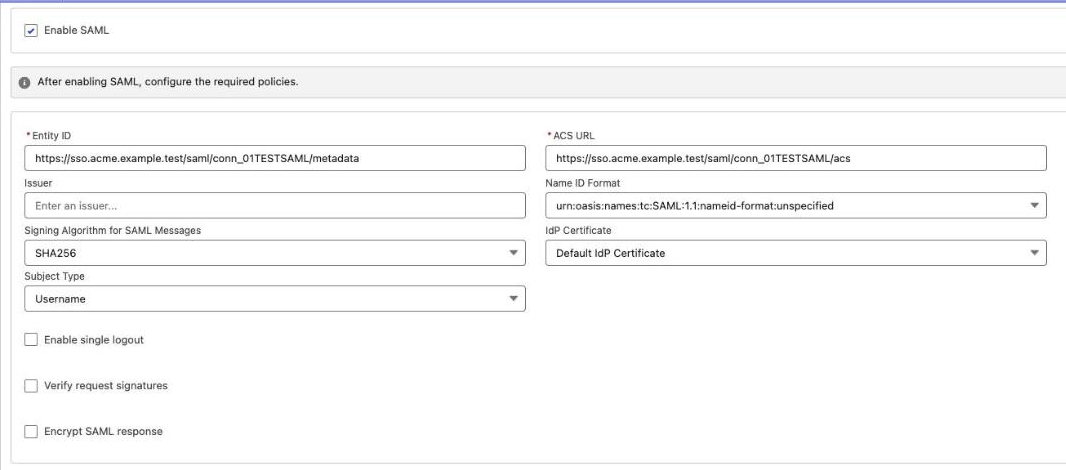
Set Signing Algorithm for SAML Messages to SHA256; the default is SHA1, which KeenAuth rejects. If KeenAuth signs its SAML requests, select Verify request signatures and upload the KeenAuth signing certificate (SP signing certificate); once a certificate is uploaded, all SAML requests must be signed. Optionally select Encrypt SAML response, then click Create.
-
Control who can use the app by managing profiles and permission sets, and update the Salesforce users with the identifier KeenAuth recognizes.
-
In KeenAuth enter the Salesforce SAML metadata: Download Metadata on Setup > Identity Provider, or the Salesforce Identity discovery endpoint <your My Domain>/.well-known/samlidp.xml shown there, then run the connection test.
Values in bold are shown on the connection's page in the Admin Portal, where this guide has them filled in.