Google Workspace
Steps verified in the identity provider's admin console.
Recommended protocol: SAML 2.0.
SAML 2.0
Connect Google Workspace with SAML 2.0
This guide is not available in your language yet; it is shown in en.
-
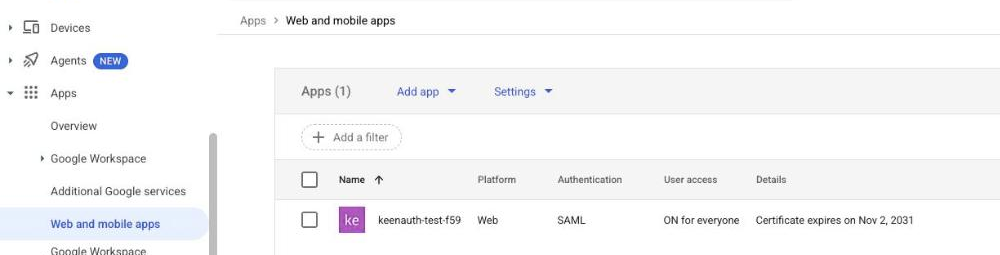
In the Google Admin console (super administrator) go to Apps > Web and mobile apps.
-
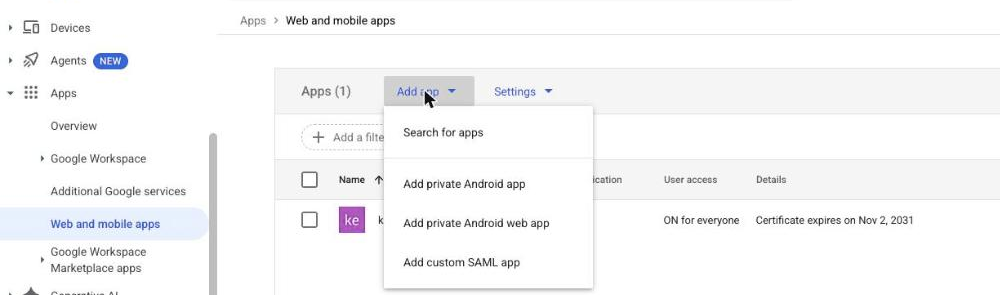
Click Add app > Add custom SAML app, enter an App name and click Continue.
-
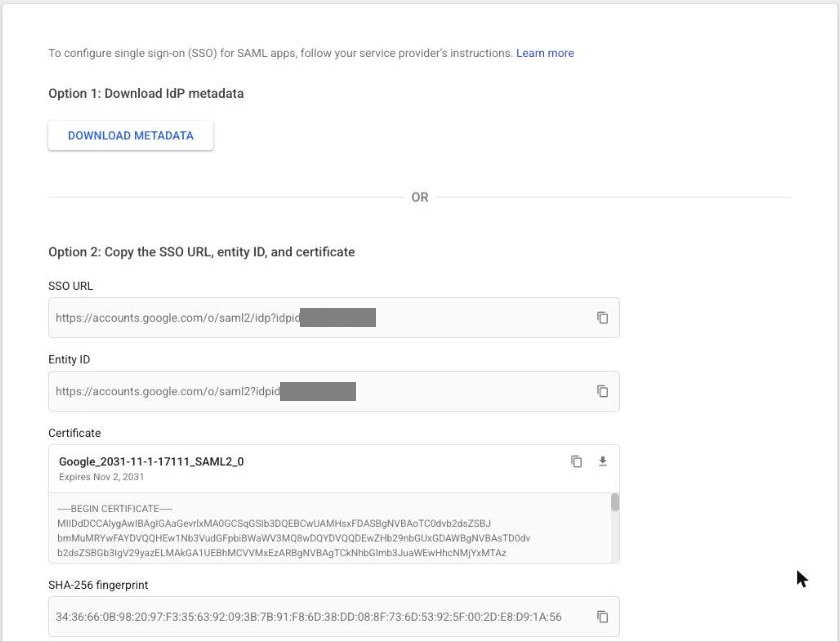
On the Google Identity Provider details page use Download Metadata (Option 1), or copy the SSO URL and Entity ID and download the certificate (Option 2), upload it in KeenAuth and click Continue.
-
On Service Provider Details enter ACS URL ACS URL and Entity ID SP entity ID; the ACS URL must start with
https://.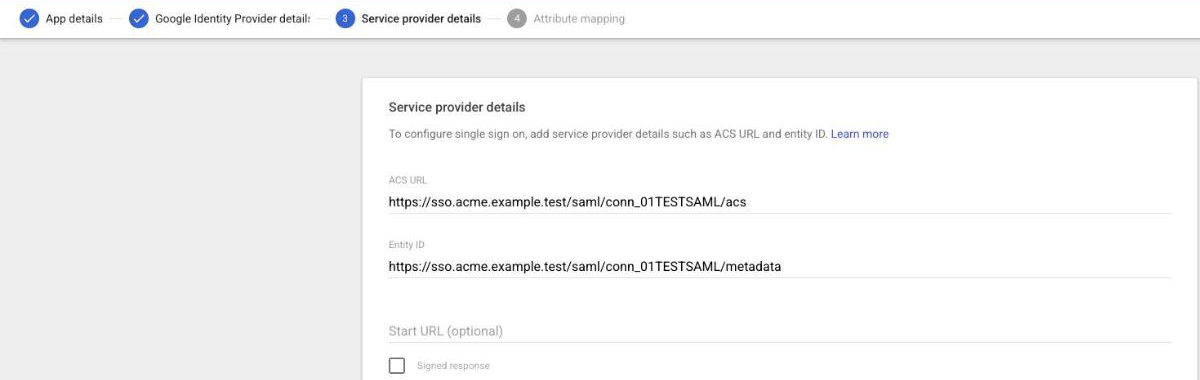
-
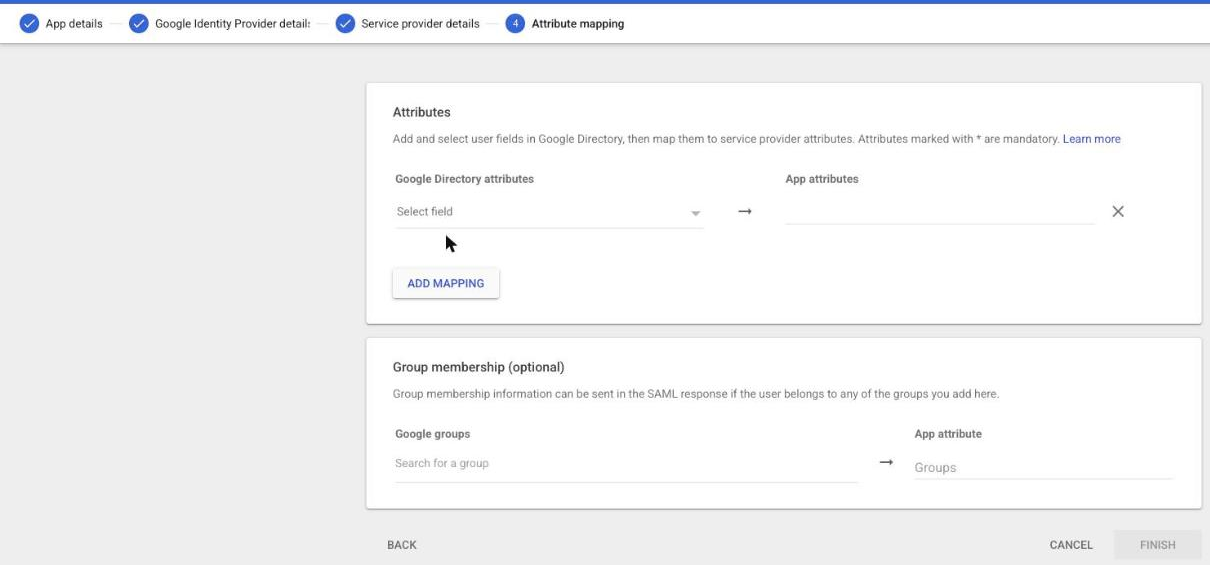
Set Name ID format to PERSISTENT (the default is UNSPECIFIED) and keep Name ID as Basic Information > Primary email, then click Continue. On Attribute mapping click Add mapping for Basic Information > First name, Last name and Primary email, and optionally add Group membership.
-
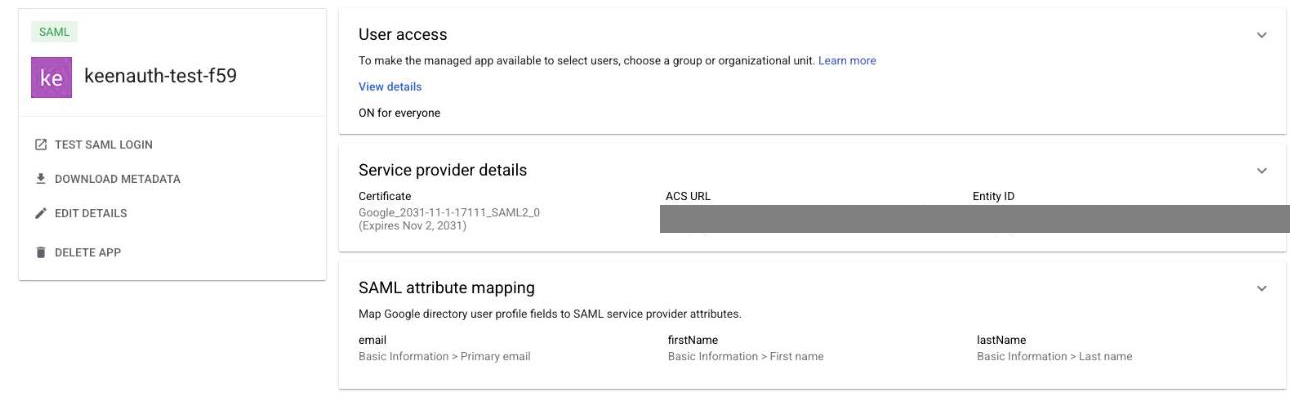
Click Finish, then on the app's page open User access, set Service status to ON for everyone or for the organizational units that should sign in and click Save. Use Test SAML login and run the KeenAuth connection test.
OpenID Connect
Connect Google Workspace with OpenID Connect
This guide is not available in your language yet; it is shown in en.
-
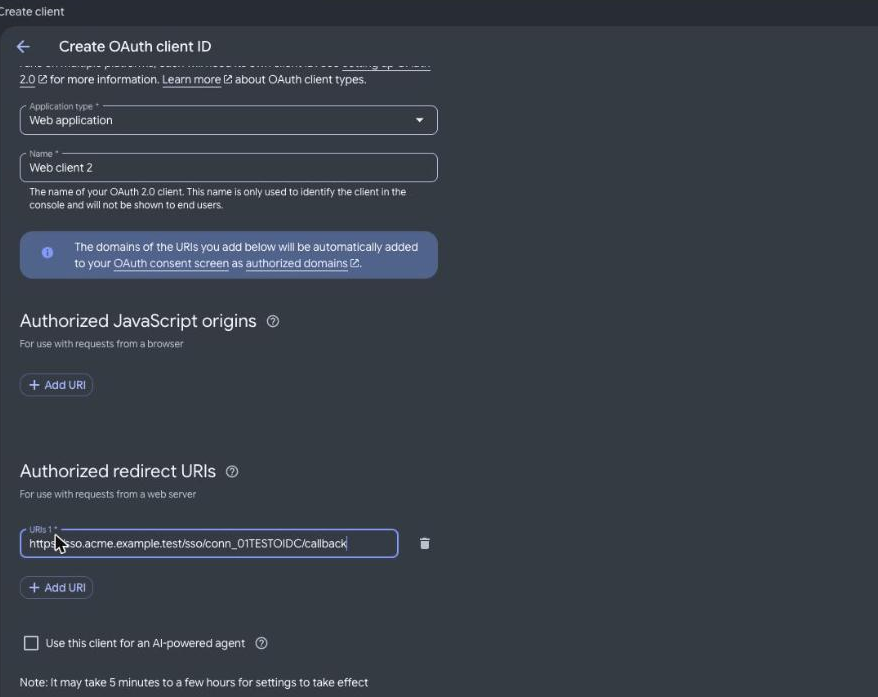
On the Google Auth Platform Clients page click Create client, choose Application type Web application, enter a Name, under Authorized redirect URIs click Add URI and enter redirect URI (HTTPS, no wildcards), then click Create. The client secret is shown only once at creation; store it securely. Settings can take from 5 minutes to a few hours to take effect.
-
In KeenAuth use issuer
https://accounts.google.comand add your Workspace primary domain to the connection's allowed email domains. -
KeenAuth requires the hd claim: personal Google accounts do not carry it and are rejected.
-
Enter the client ID and secret in KeenAuth and run the connection test with a Workspace account.
SCIM 2.0
There is no separate guide for this protocol; follow the generic guide.
Values in bold are shown on the connection's page in the Admin Portal, where this guide has them filled in.