Okta
Steps verified in the identity provider's admin console.
Recommended protocol: OpenID Connect.
The identity provider can provision users and groups with SCIM 2.0.
SAML 2.0
Connect Okta with SAML 2.0
This guide is not available in your language yet; it is shown in en.
-
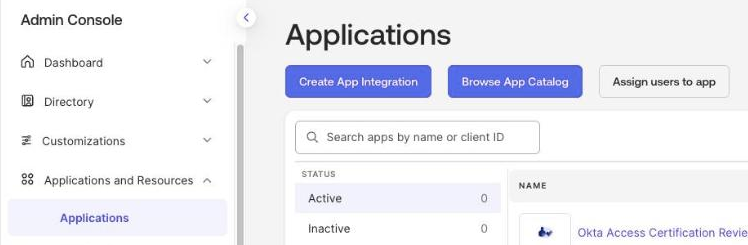
In the Okta Admin Console go to Applications and Resources > Applications and click Create App Integration.
-
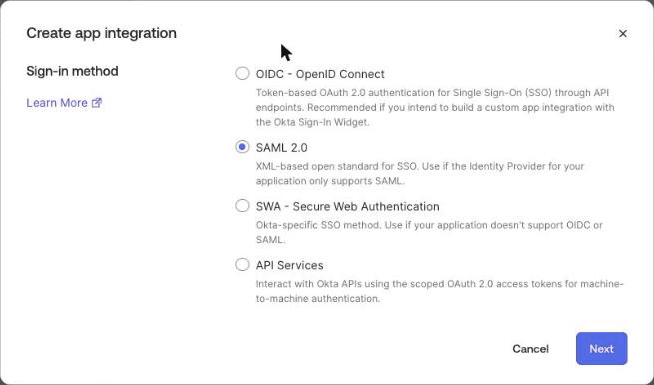
Under Sign-in method choose SAML 2.0 and click Next. On General Settings enter an App name and click Next.
-
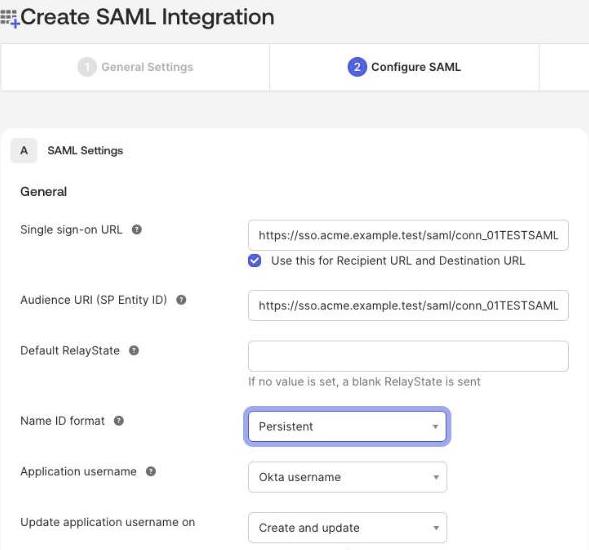
On Configure SAML enter ACS URL as Single sign-on URL (keep Use this for Recipient URL and Destination URL selected) and SP entity ID as Audience URI (SP Entity ID). Set Name ID format to Persistent and click Next.
-
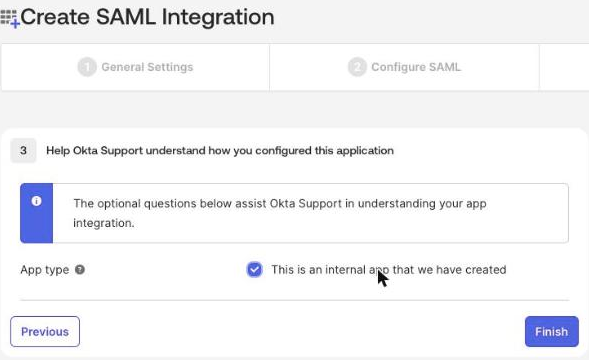
On Feedback select This is an internal app that we have created and click Finish. Okta opens the app's Sign On tab.
-
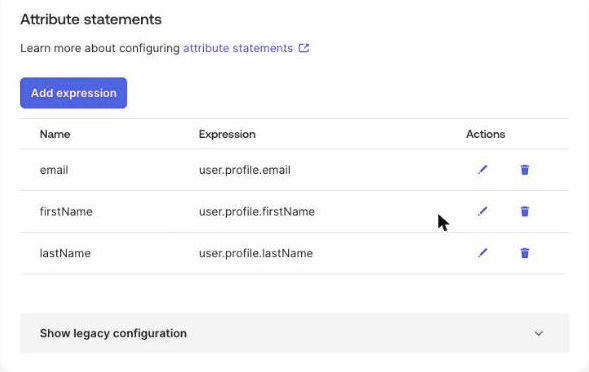
On the Sign On tab, under Attribute statements, click Add expression three times: Name email with Expression user.profile.email, Name firstName with user.profile.firstName, and Name lastName with user.profile.lastName. For group-to-role mapping open Show legacy configuration and add a Group attribute statement named groups with a Filter.
-
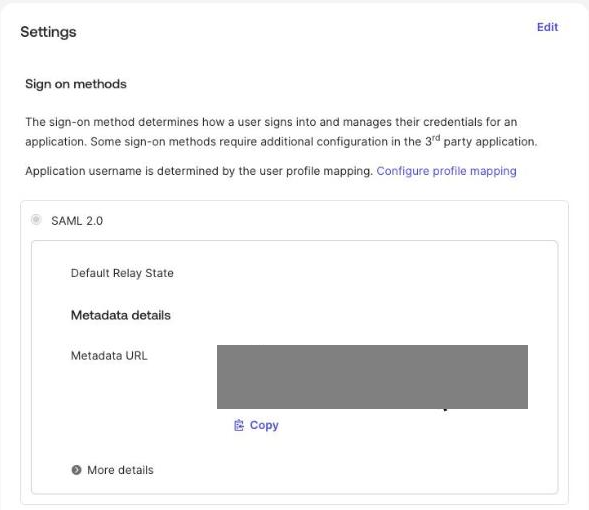
On the same tab copy the Metadata URL under Metadata details (the SAML Signing Certificates list has the certificate). On the Assignments tab assign the people or groups who should sign in, then upload the Okta metadata in KeenAuth and run the connection test.
OpenID Connect
Connect Okta with OpenID Connect
This guide is not available in your language yet; it is shown in en.
-
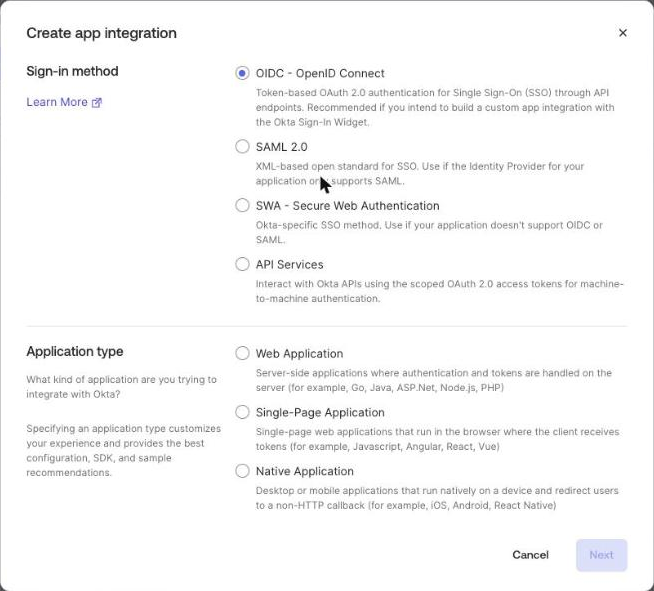
In the Okta Admin Console go to Applications and Resources > Applications, click Create App Integration and under Sign-in method choose OIDC - OpenID Connect.
-
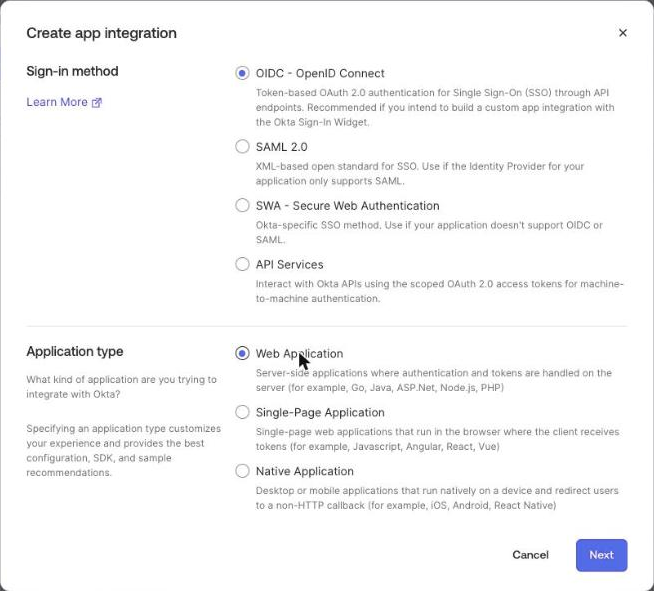
Under Application type choose Web Application and click Next.
-
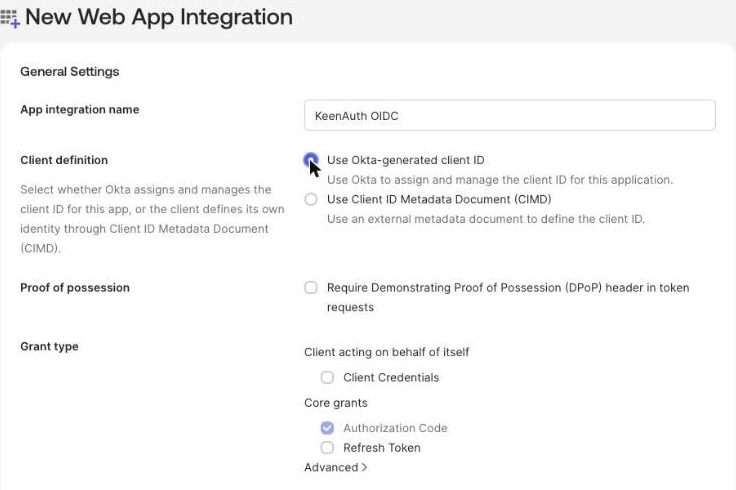
Replace the prefilled App integration name and under Client definition select Use Okta-generated client ID (nothing is preselected; the rest of the form appears after this choice). Keep the Authorization Code grant type selected.
-
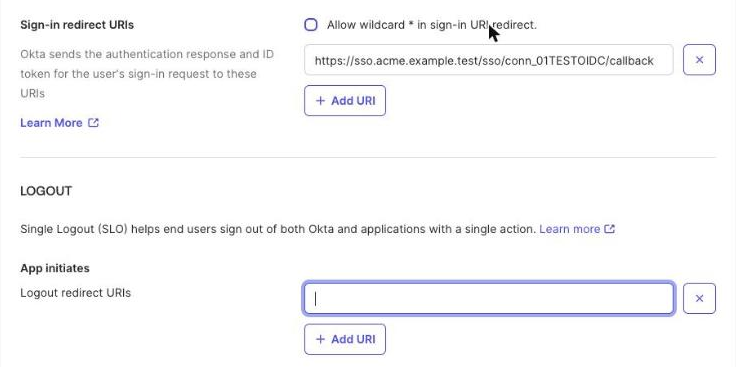
Replace the prefilled Sign-in redirect URI with redirect URI (an absolute URI; leave Allow wildcard off). Under LOGOUT > App initiates remove the prefilled Logout redirect URI with its X button.
-
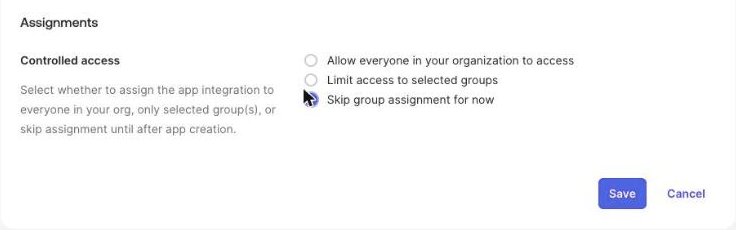
Under Assignments > Controlled access choose who gets access (none is preselected) and click Save.
-
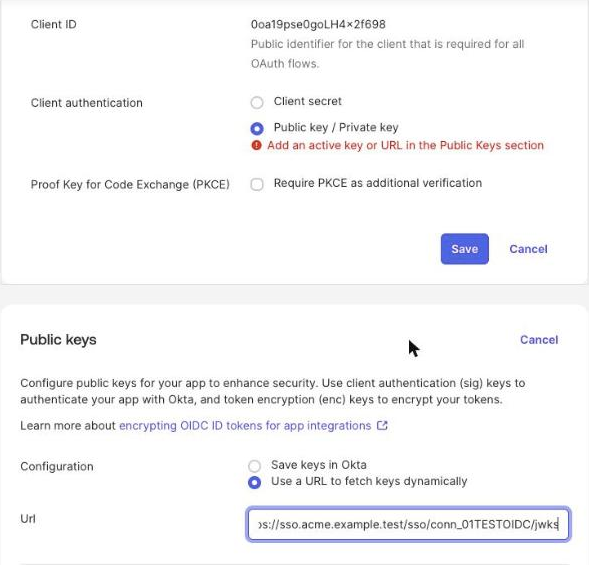
On the General tab copy the Client ID. For private_key_jwt click Edit under Client Credentials and choose Client authentication: Public key / Private key, then click Edit in the Public keys section, choose Use a URL to fetch keys dynamically, enter KeenAuth key set URL and save (until the URL is set Okta shows Add an active key or URL in the Public Keys section). Or choose Client secret and copy the secret from CLIENT SECRETS.
-
Record the issuer exactly as Okta publishes it (the organization URL, or
https://<org>.okta.com/oauth2/<id> for a custom authorization server) and enter it in KeenAuth with the Client ID.
SCIM 2.0
Provision users from Okta with SCIM 2.0
This guide is not available in your language yet; it is shown in en.
-
In KeenAuth create a directory and copy the SCIM base URL SCIM base URL and the bearer token SCIM token (shown once).
-
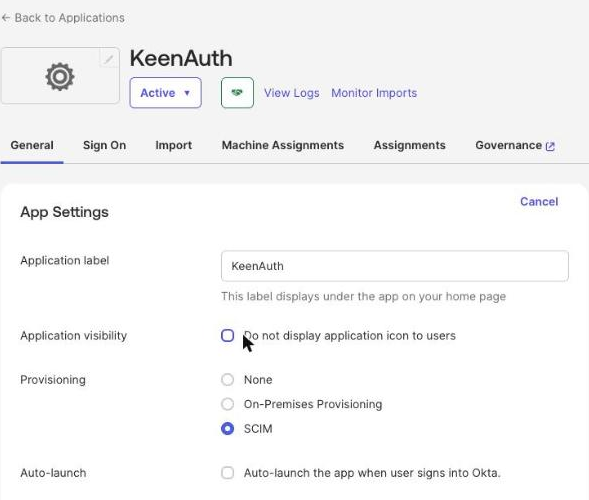
In Okta open the SAML app integration, on the General tab click Edit under App Settings, set Provisioning to SCIM and click Save.
-
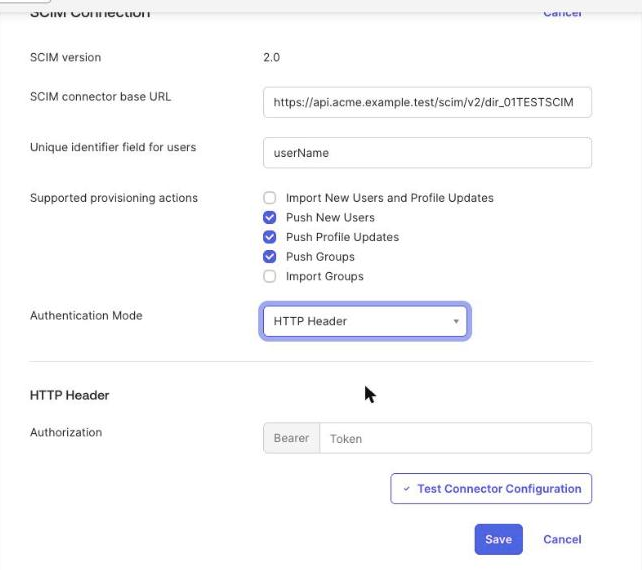
On the new Provisioning tab under Integration click Edit next to SCIM Connection: enter the base URL as SCIM connector base URL, userName as Unique identifier field for users, select Push New Users, Push Profile Updates and Push Groups, choose Authentication Mode HTTP Header and paste only the token after the fixed Bearer prefix of the Authorization field. Click Test Connector Configuration, then Save.
-
Under To App enable creating, updating and deactivating users and turn off "Set password when creating new users" (KeenAuth does not accept passwords over SCIM and rejects such a create); keep userName, givenName, familyName and emails mapped.
-
Assign users or groups and confirm they appear in the KeenAuth directory.
Values in bold are shown on the connection's page in the Admin Portal, where this guide has them filled in.